> ## Documentation Index
> Fetch the complete documentation index at: https://pinata-mintlify-a8f2129e.mintlify.site/llms.txt
> Use this file to discover all available pages before exploring further.
# Pinning Service API
Not to be confused with the IPFS API, the Pinning Service API allows you to create a link between your local IPFS node and Pinata
## IPFS Pinning Services API Spec Compatibility
The [IPFS Pinning Services API Spec](https://ipfs.github.io/pinning-services-api-spec/) is a standardized specification for developers building on top of IPFS that allows an application to integrate a pinning service without needing to learn that pinning service's unique API.
### Endpoints
Pinata users looking to utilize the IPFS Pinning Services API can do so from our dedicated API endpoint:
`https://api.pinata.cloud/psa`
For an up-to-date list of available endpoints, as well as current documentation, please visit the [Official Endpoint Documentation](https://ipfs.github.io/pinning-services-api-spec/#tag/pins).
### Authentication
To authenticate with Pinata through the Pinning Services API spec, you'll first need to have an `accessToken`. You can create this API token on the [Pinata Keys Page](https://pinata.cloud/keys).
When you create a new API key, you'll need to take note of the JWT ([JSON Web Token](https://jwt.io/)) token that's shown to you immediately after creation. This JWT is specific to the API key and shares the same permissions.
If you ever revoke the API key for this JWT, this JWT will no longer be valid for authenticating to the Pinning Services API.
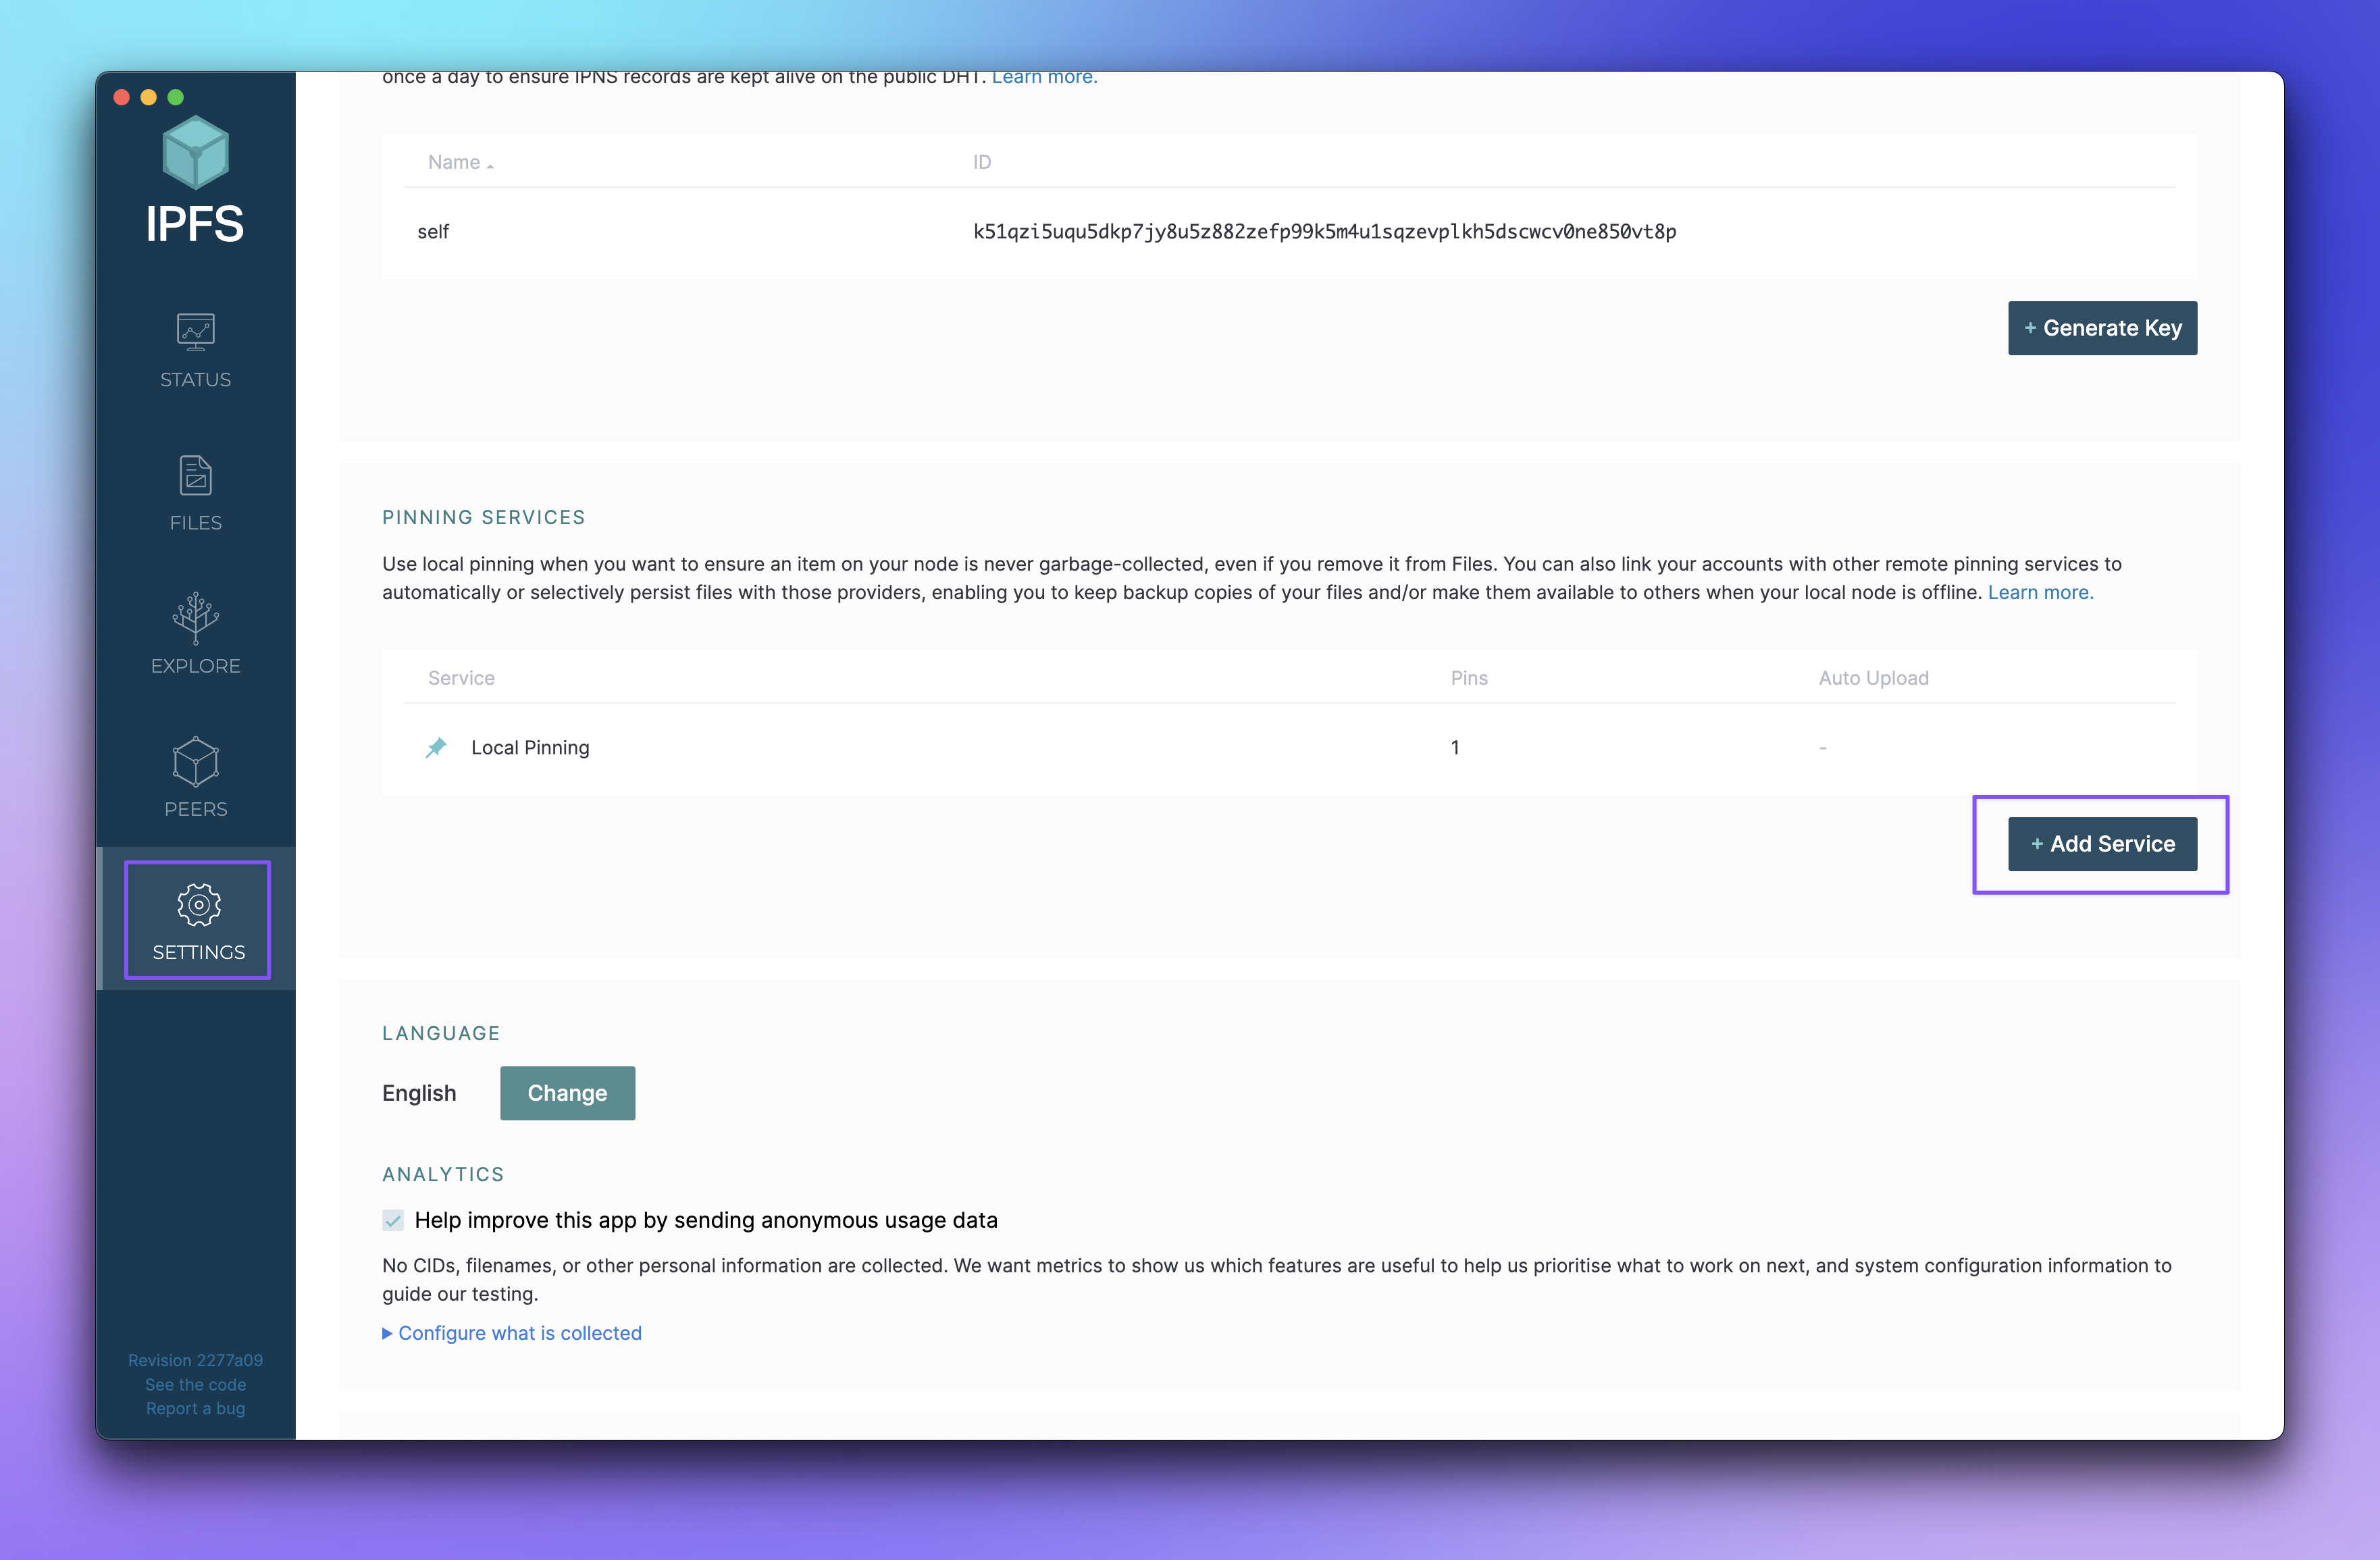
**Configuring Pinata in the IPFS Desktop App**
If you are running the IPFS desktop app, you can configure your pinning service of choice within the user interface. To do so, open the app, go to your Preferences, then click Add Service:
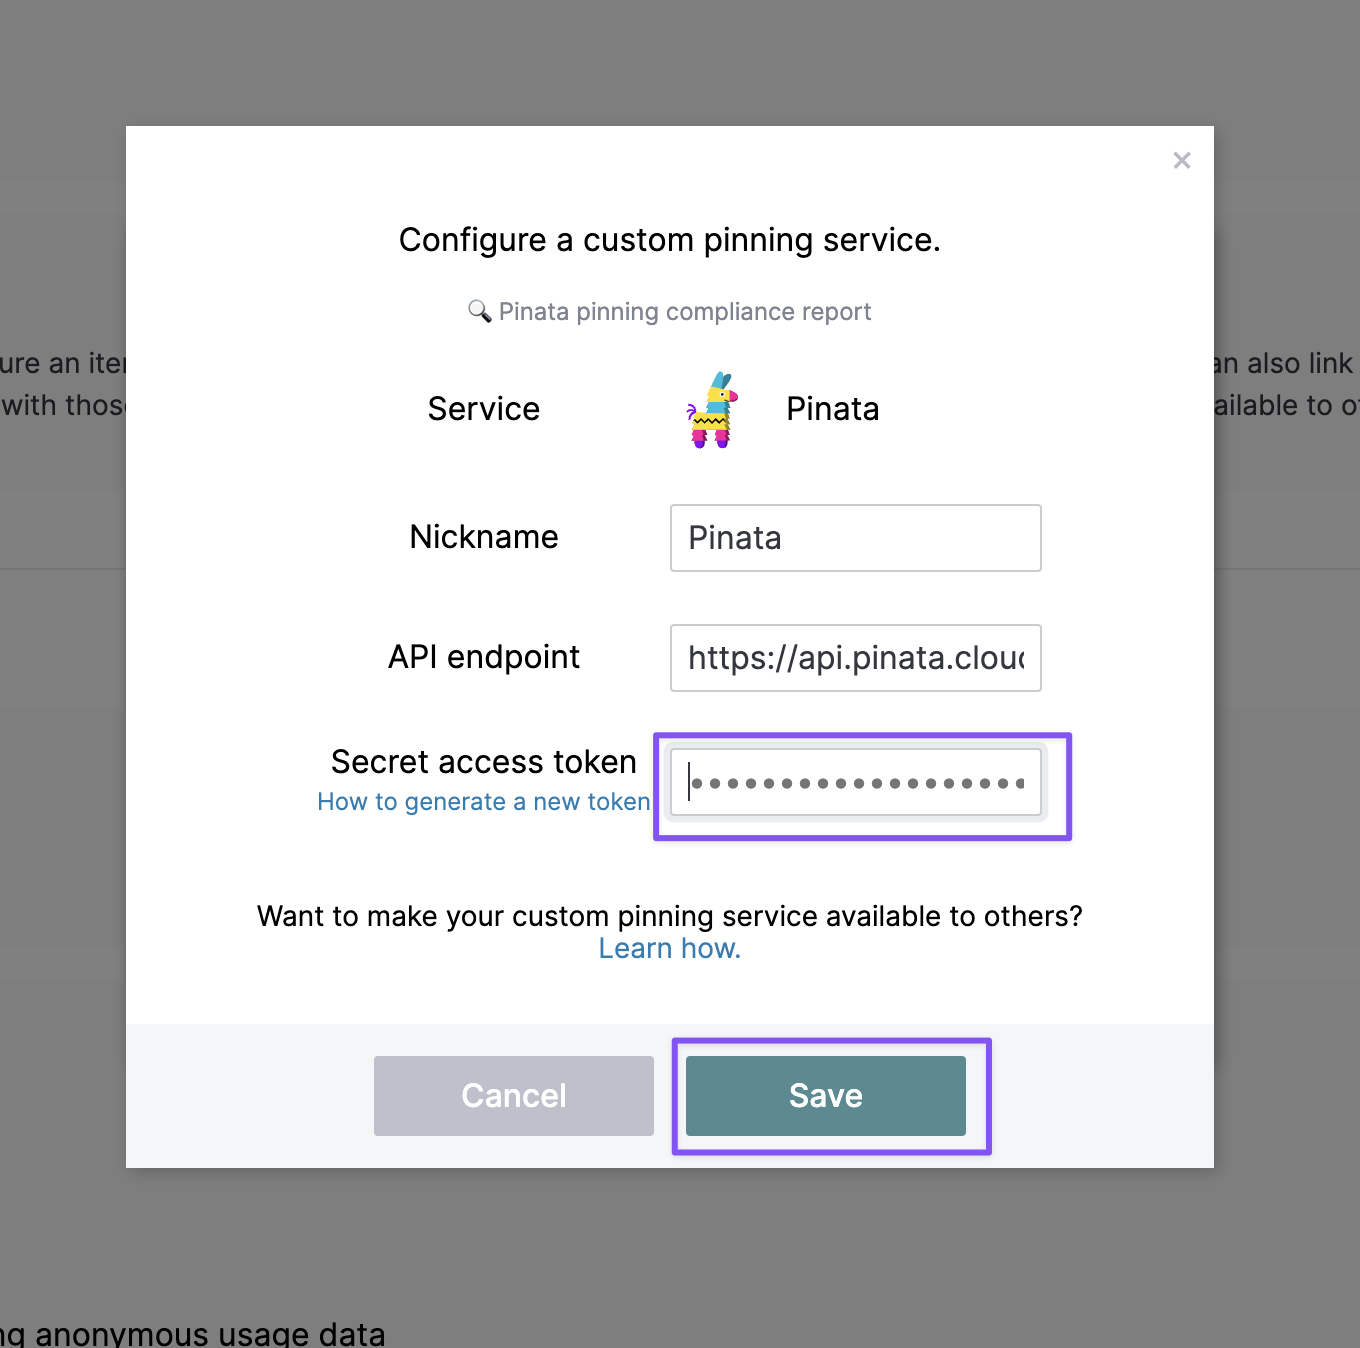
 Select Pinata as the pinning service, and then configure with your secret access token (JWT):
 From there you can upload files and have the option to pin locally as well as remotely to Pinata!
 ### Configuring Pinata in the IPFS CLI
You can also pin to Pinata directly from the IPFS CLI using the `ipfs` command.
To add Pinata credentials, use the following command (where YOUR\_JWT is the JWT token described in the “Authentication” section above):
```bash theme={null}
ipfs pin remote service add pinata https://api.pinata.cloud/psa YOUR_JWT
```
To pin a CID to Pinata under a human-readable name:
```bash theme={null}
ipfs pin remote add --service=pinata --name=war-and-peace.txt bafybeib32tuqzs2wrc52rdt56cz73sqe3qu2deqdudssspnu4gbezmhig4
```
To list successful pins:
```bash theme={null}
ipfs pin remote ls --service=pinata
```
To list pending pins:
```bash theme={null}
ipfs pin remote ls --service=pinata --status=queued,pinning,failed
```
For more commands and general help:
```bash theme={null}
ipfs pin remote --help
```
### Configuring Pinata in the IPFS CLI
You can also pin to Pinata directly from the IPFS CLI using the `ipfs` command.
To add Pinata credentials, use the following command (where YOUR\_JWT is the JWT token described in the “Authentication” section above):
```bash theme={null}
ipfs pin remote service add pinata https://api.pinata.cloud/psa YOUR_JWT
```
To pin a CID to Pinata under a human-readable name:
```bash theme={null}
ipfs pin remote add --service=pinata --name=war-and-peace.txt bafybeib32tuqzs2wrc52rdt56cz73sqe3qu2deqdudssspnu4gbezmhig4
```
To list successful pins:
```bash theme={null}
ipfs pin remote ls --service=pinata
```
To list pending pins:
```bash theme={null}
ipfs pin remote ls --service=pinata --status=queued,pinning,failed
```
For more commands and general help:
```bash theme={null}
ipfs pin remote --help
```